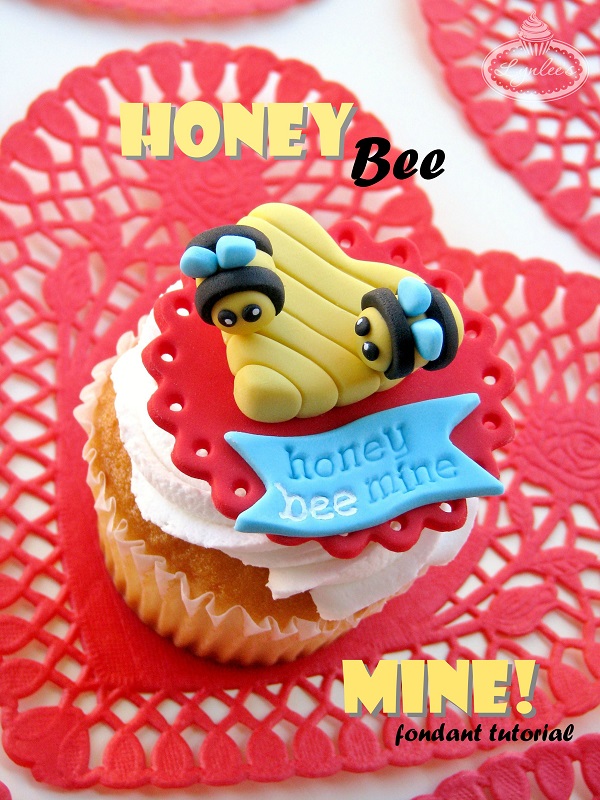
A couple of seasons ago, I released a publication, Lynlee’s Vintage Valentines, containing the step-by-step instructions to create four sweet Valentine fondant cupcake toppers. Since it continues to be one of my most popular tutorials, I thought it would be fun to share the directions for the Honey Bee Mine fondant topper for your Valentine cupcakes this year!
Materials Needed:
♥ Red, light blue, yellow and black fondant
♥ Fondant rolling pin with 1/8″ guide rings
♥ Rolling pastry cutter
♥ Scalloped round cutter {approx. 2”}
♥ Medium heart-shaped cutter
♥ Round decorating tips #3 and #10
♥ Water/edible glue and brush
♥ White soft gel paste
♥ Letter embossers/plastic wrap
♥ Toothpick
♥ Knife tool
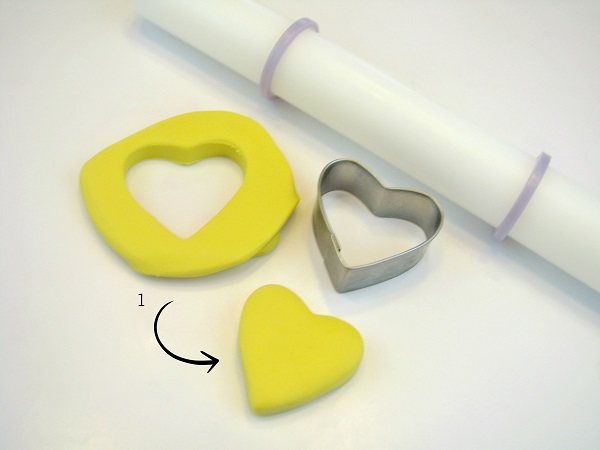
Step 1:
Roll out yellow fondant thick {approximately 1/3” thick}. Cut out a heart shape with the cutter.
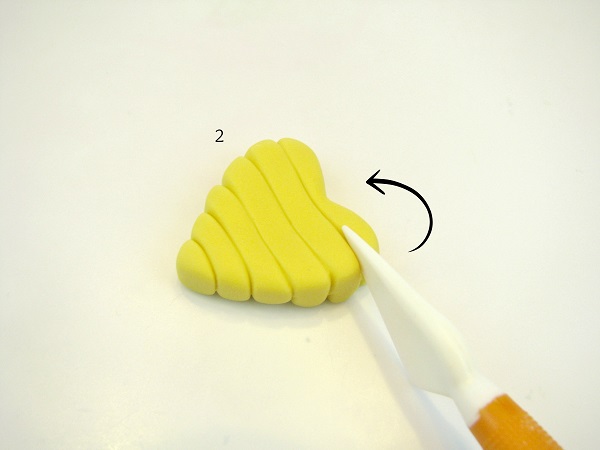
Step 2:
With a knife tool, make linear indentations, starting at the bottom of the shape, across the top and finishing it off on the bottom of the other side. This will give it a puffy look to create the heart hive.
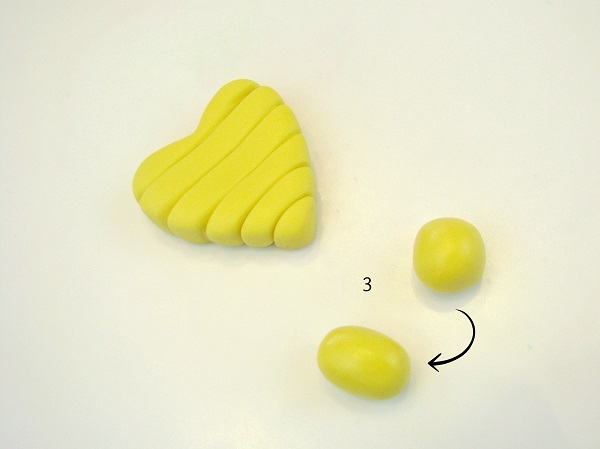
Step 3:
Roll two pieces of yellow fondant into a ball and then with your fingers, gently spread it out to make the shape more oval to create the bees’ bodies.
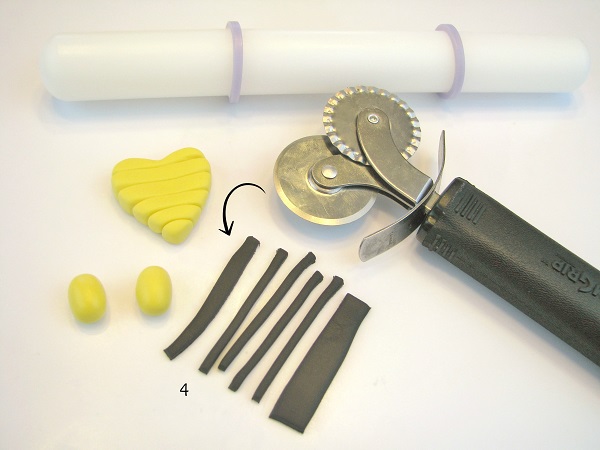
Step 4:
Roll out some black fondant with the rolling pin and 1/8″ guide rings and with the rolling cutter, cut four strips for the bees.
Step 5:
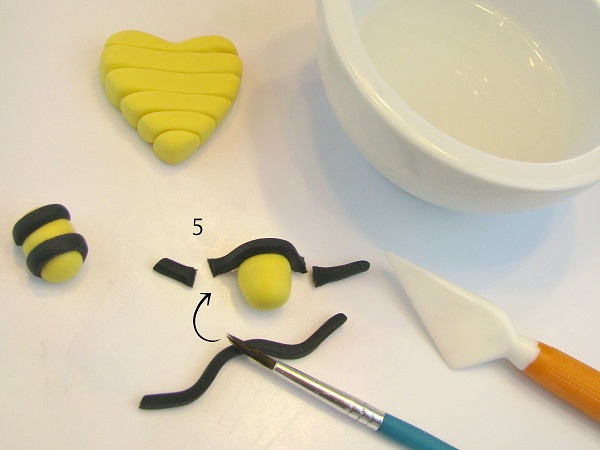
Glue the black stripes onto the bees {2 each} and trim off any excess. Make sure it wraps around enough to cover a bit of the bottom of the bees’ bodies.
Step 6:
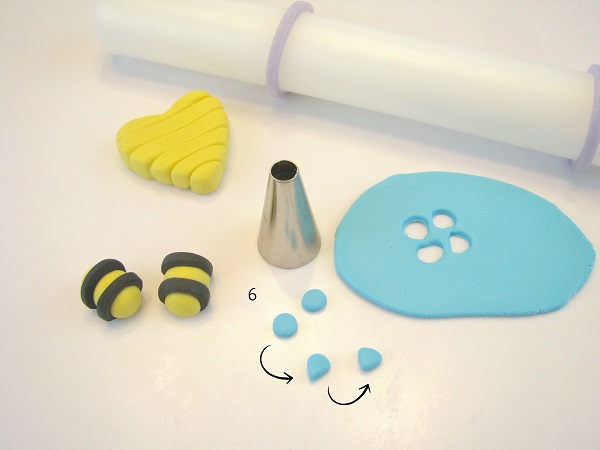
Roll out the light blue fondant with the rolling pin and 1/8″ guide rings and cut out four circles with round decorating tip #10. Grab a piece of the circle and pinch it together and with your other hand, flatten the opposite end a bit to create bee wings.
Step 7:
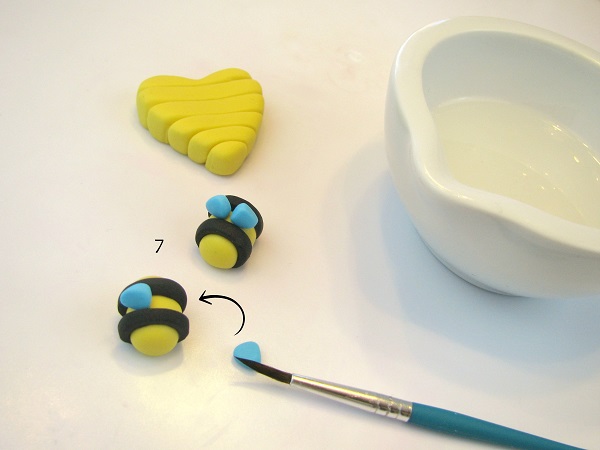
Glue the blue wings onto each of the bees with the pointed sides down. Once gluing them, hold them in place for a few seconds to ensure they are securely fastened to the bees.
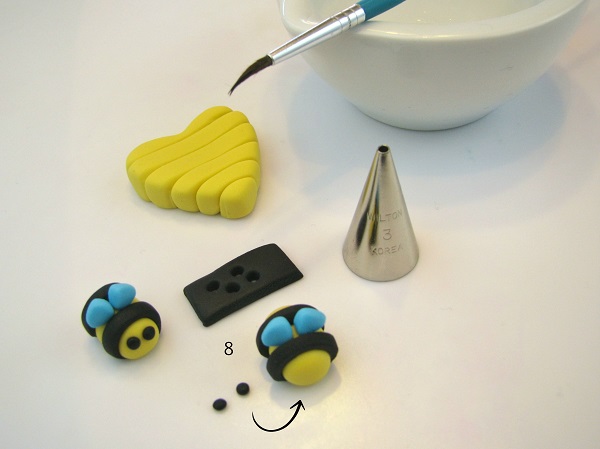
Step 8:
Roll out a bit of black fondant with the rolling pin and 1/8″ guide rings and with round decorating tip #3, cut out four little circles to make the bees’ eyes. Glue them on with a bit of water.
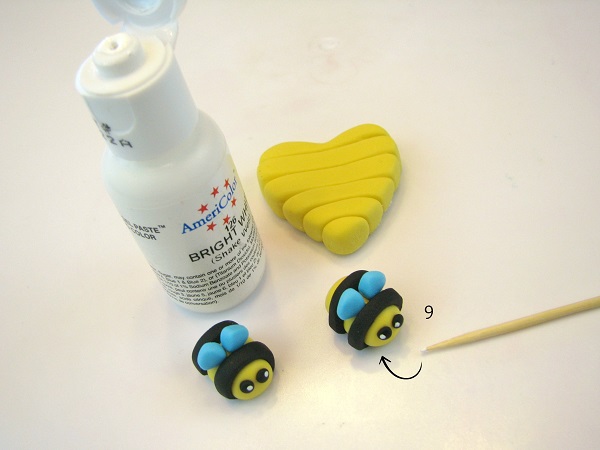
Step 9:
Dip a toothpick into the white soft gel paste and dab them onto the black eyes of the bees.
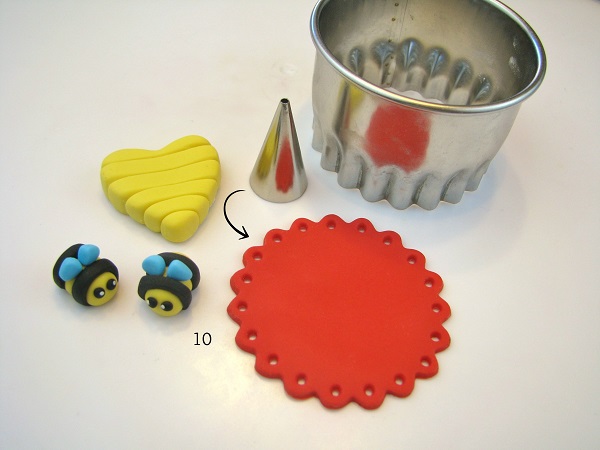
Step 10:
Roll out red fondant with the rolling pin and 1/8″ guide rings and with the scalloped round cutter, cut out a circle. Utilize round decorating tip #3 to cut small circles around the perimeter of the scallops, cleaning them up, if necessary.
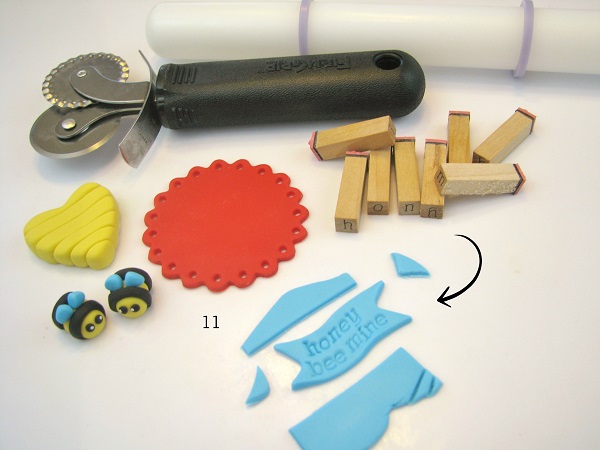
Step 11:
Roll out some light blue fondant and with the embossers, stamp out “honey bee mine”. Make sure they are food safe and if not, utilize plastic wrap in between to avoid contamination. Trim the excess on the top and bottom and cut out “V” shapes on each side. Shape the saying into a wave.
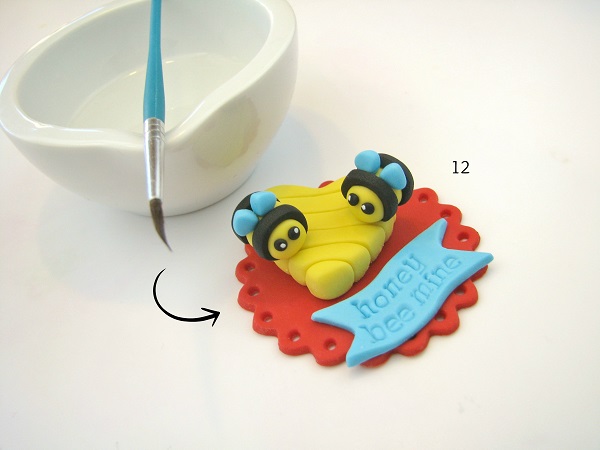
Step 12:
Glue the bees to the hive and the hive and message to the scalloped bottom and allow the topper to dry thoroughly. Utilize the toothpick and soft gel paste if highlighting the key word in the message.
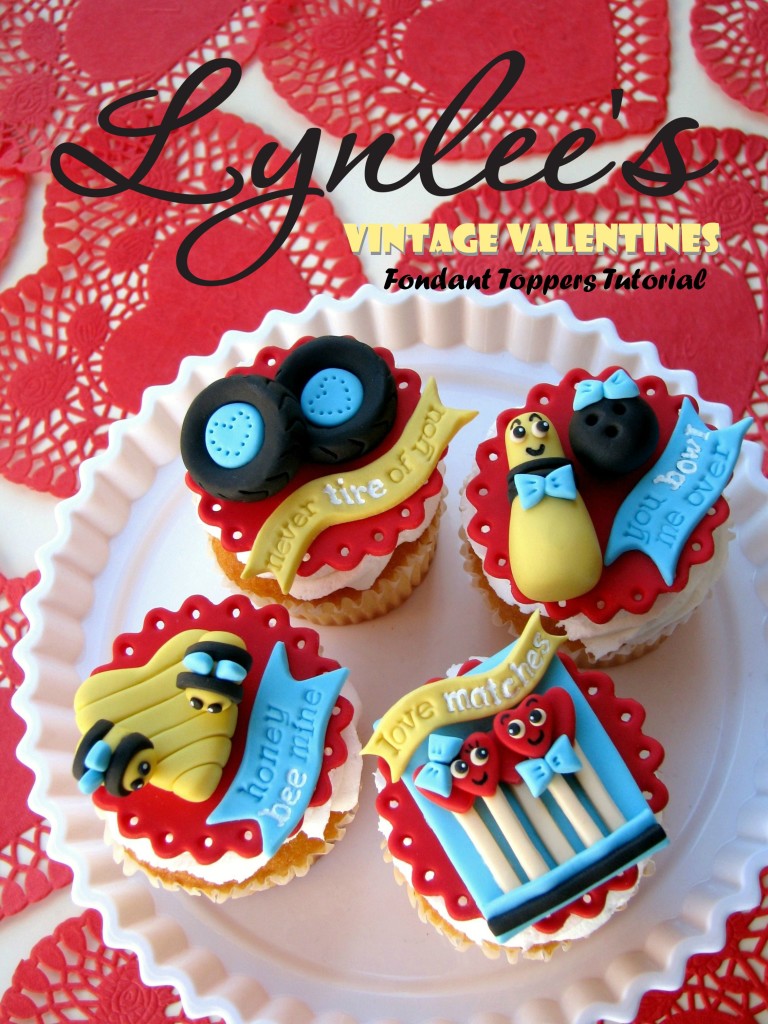
And don’t forget, if you are interested in the instructions to re-create all four cupcake topper designs, feel free to check out Lynlee’s Vintage Valentines!
For additional Valentine-inspired projects, be sure to take a look at the following posts:
♥ You’re Just My Type party
♥ Baked with Love play date
♥ Perfect Match cake pop tutorial
♥ I Love Ewe fondant tutorial
♥ Fortunate to Have a Valentine Like You cookies
♥ Ex-STRAW-ordinary Valentine gifts
Happy Valentine’s Day, sweet friends!
Merci Beaucoup!

This page may contain affiliate links. For more information, please read my Terms & Disclosure policy.


Hi Lynlee!
Love ure blog! Love ure book! Love all of the fabulous things you do 🙂
Can u pls tell me the brand of the stamps that you used in this honey be mine set? Also if it has a font name?
Thanks so much
Thank you so very much for the sweet and kind words, Sarah! As far as the stamps go, unfortunately they were just generic stamps that I purchased years ago at a Michaels store. Not sure if they still carry them. Sorry I’m not much help! Food-safe stamps are preferable, but as I mention in the tutorial, if you are utilizing regular stamps like these, make sure you use a plastic wrap or something similar in between to ensure they don’t touch the fondant directly! 🙂